Arduino Mega, everything you need to know


Arduino Mega 2560, everything you need to know
Introduction
A few days ago I was talking with a friend that I did not see for months, he is passionate about the Internet of Things and that last time we spoke he told me that he was working on a project for a Weather Station He shared that he was using an Arduino UNO as the brain to which all the sensors were connected. To my surprise, at this moment it already has 32 Meteorological Stations strategically scattered in order to obtain statistical data that provides it with information to carry out artificial intelligence, trend analysis, among others. One of the details that he explained to me was the fact that now the project had two Arduino components, one was an Arduino Mega as the brain and control of all the sensors and the other an Arduino UNO as a watchdog of the brain (Arduino Mega). So I am curious to learn more about the capabilities of the Arduino Mega and compare it to the Arduino Uno; document my observations and share these findings in this tutorial.
The first thing we should know is the basics, that is, the first question you can ask yourself is:
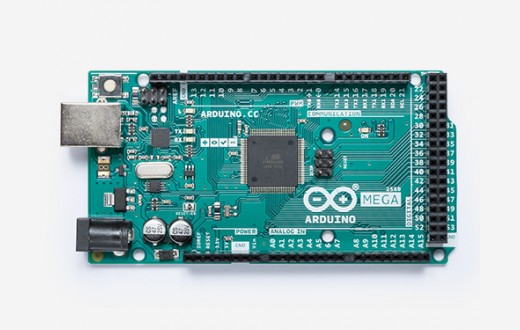
What is Arduino Mega?
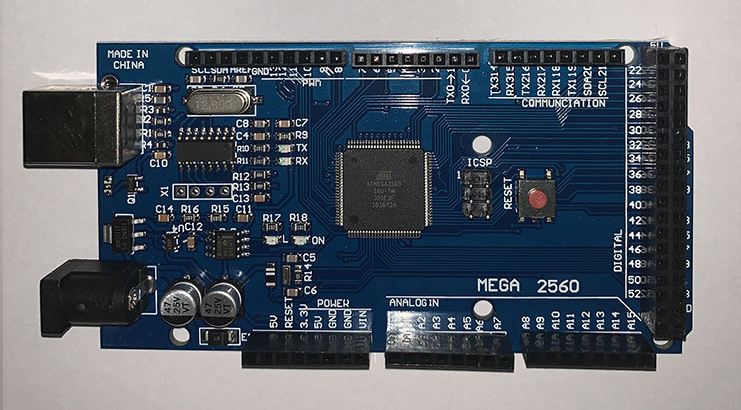
Arduino Mega 2560 R3 is a much more powerful development board than the Arduino UNO. As we name the board is indistinct, “Arduino Mega”, “Arduino Mega 2560” or “Arduino Mega 2560 R3”, in this tutorial we will call it “Arduino Mega”.
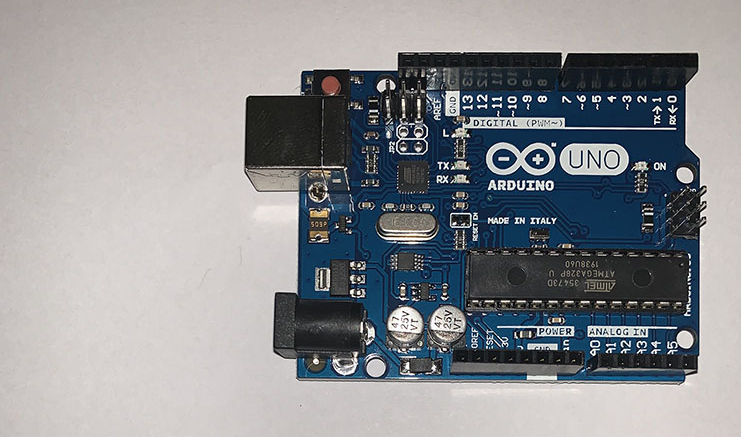
Physical comparison between Arduino Mega and Arduino UNO
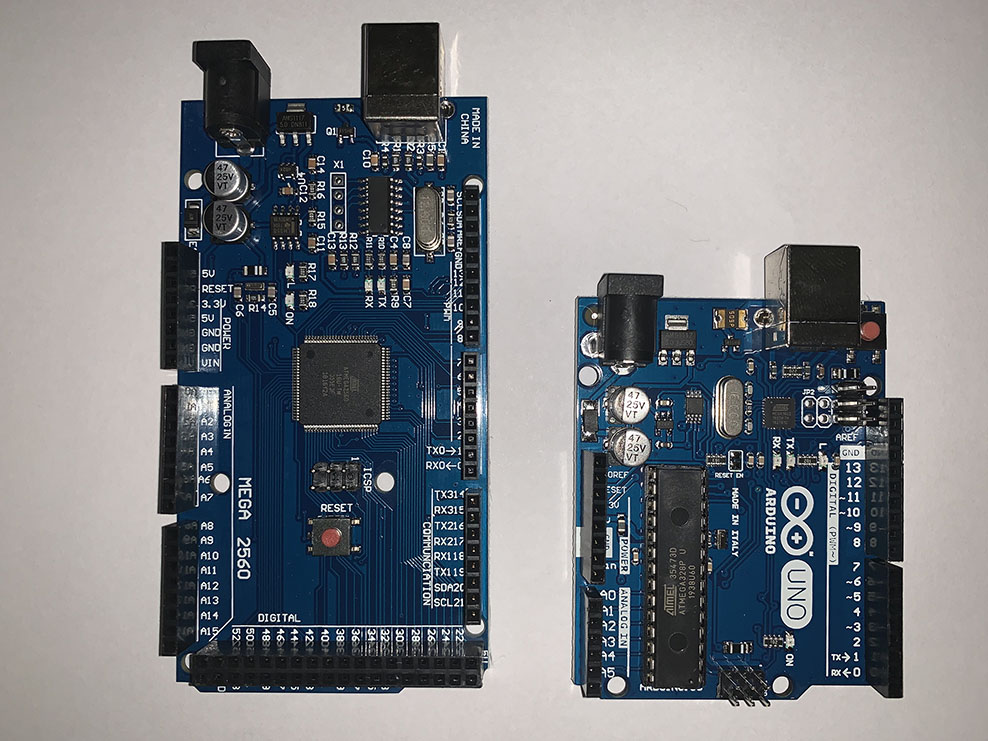
But in what is more powerful?, for this we have to see how they differ:
Difference between Arduino Mega and Arduino UNO
The most significant differences between the Arduino Mega and the Arduino UNO is the board size, the capacity of the flash memory, as well as the number of pins digital and analog. However, the boards have the same characteristics regarding voltage, pin current, clock speed and built-in led. Below, you can see these differences in more detail and also the similarities between the two plates.
Technical characteristics
| Characteristic | Arduino Mega 2560 | Arduino UNO |
|---|---|---|
| Microcontroller | ATmega2560 | ATmega328P |
| Operating Voltage | 5V | 5V |
| Input voltage (recommended) | 7-12V | 7-12V |
| Input voltage (limit) | 6-20V | 6-20V |
| Digital input/output pins | 54 (15 PWM outputs) | 14 (6 PWM outputs) |
| Analog input pins | 16 | 6 |
| Current per input/output pins | 20mA | 20mA |
| Current for 3.3V pin | 50mA | 50mA |
| Flash memory | 256KB (8KB bootloader) | 32KB (0.5KB bootloader) |
| SRAM memory | 8KB | 2KB |
| EEPROM memory | 4KB | 1KB |
| Clock Speed | 16Mhz | 16Mhz |
| Built-in led | 13 | 13 |
| Length | 101.52mm | 68.6mm |
| Width | 52.3mm | 53.4mm |
| Weight | 37g | 25g |
Where to buy
In the Arduino Store
![]()
In the C&D Technologia Store
![]()
In the Amazon Store
![]()
Differences between original plates and copies
Actually, all boards use the same microcontroller depending on the model. Therefore, an Arduino copy and an original Arduino are programmed the same. The difference is in where it is made and in the components, and that is where the problem lies. If you want to know more details about acquiring an original board or a copy, I invite you to see the article on Buy original Arduino or Arduino copy, you choose
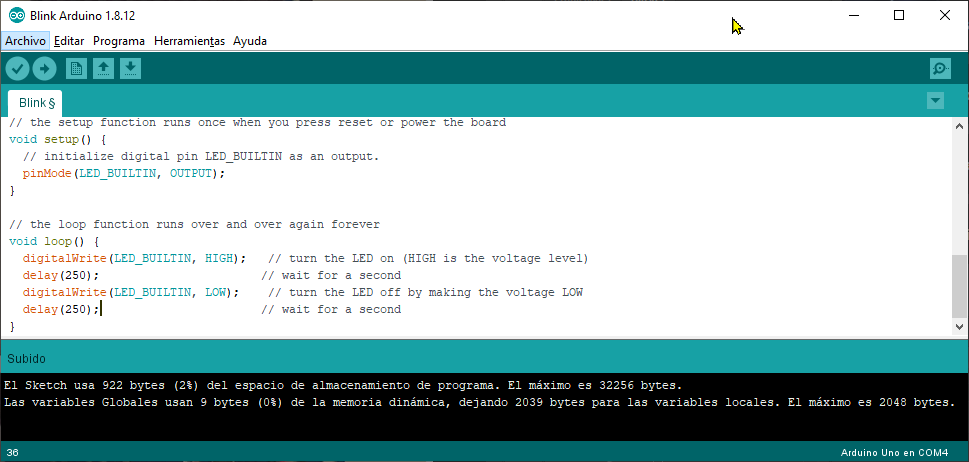
How to program the Arduino Mega
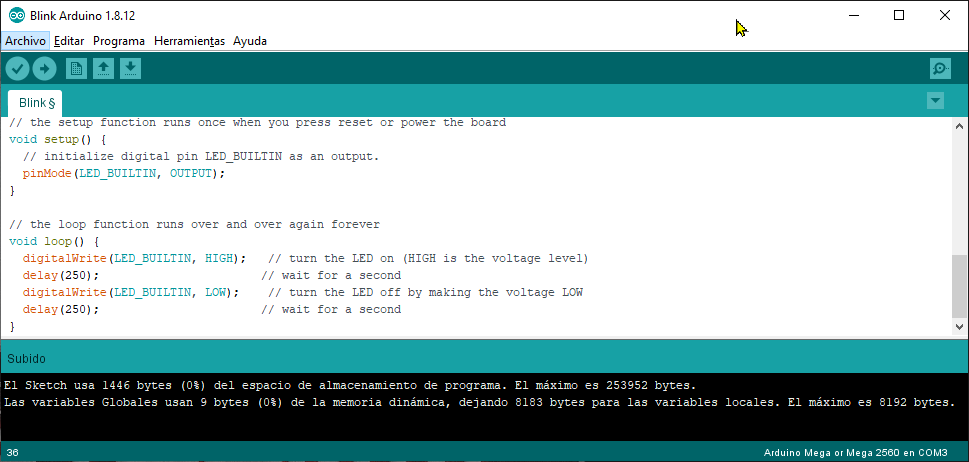
To program the Arduino Mega, the Arduino IDE v1.8.12 software was used, the board was connected through the USB cable to the computer, and the following elements were defined to make the connection:
| Type | Value |
|---|---|
| Board | “Arduino Mega or Mega 2560” |
| Processor | ATmega 2560 (Mega 2560) |
| Port | COM3 (Depends on your configuration) |
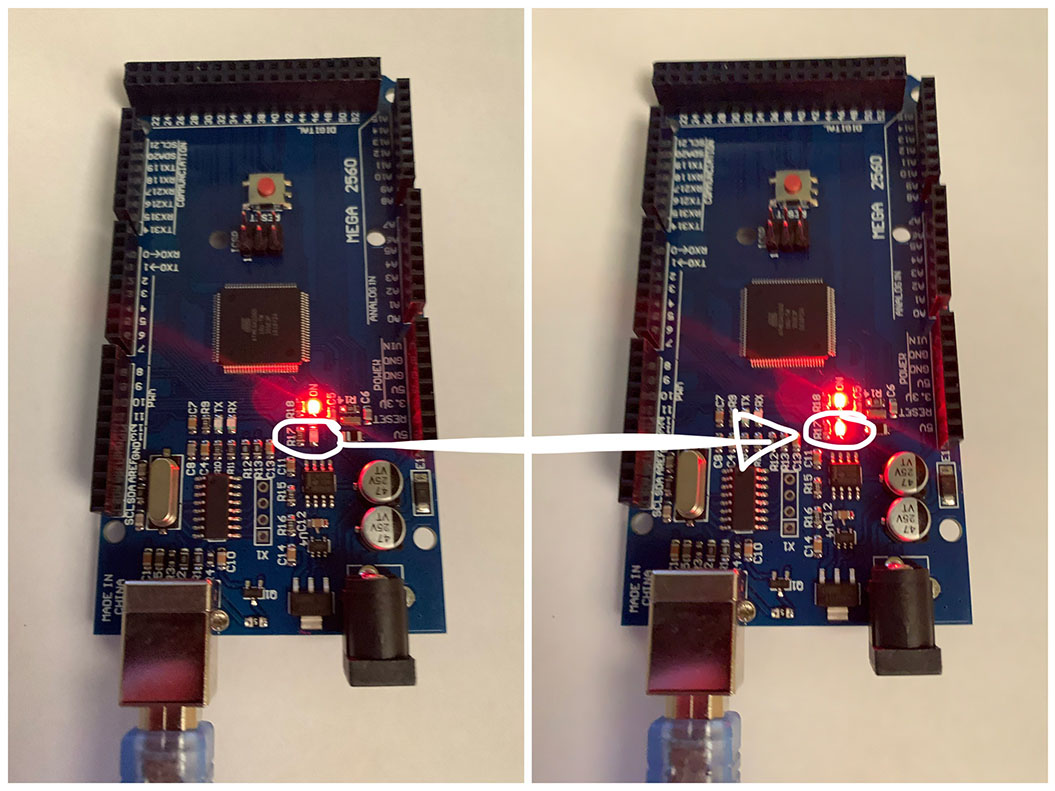
The simplest and fastest test, use of the built-in led
-
Select the project Blink that comes in the Examples of 01.Basics
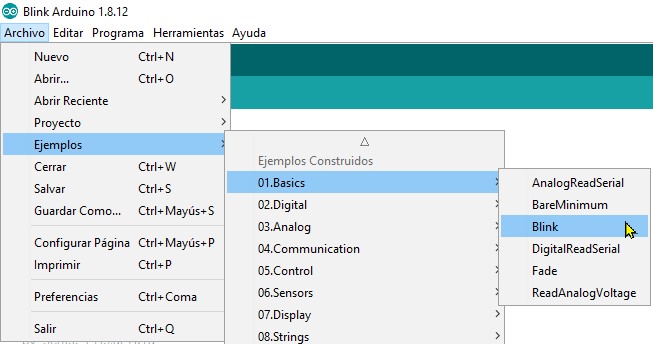
-
Modify the milliseconds of the two
delayinstructions so that the “blink” of the LED incorporated in the board is more noticeable.delay(250); -
Upload the program.
-
Check the off and on of the led incorporated in the board.
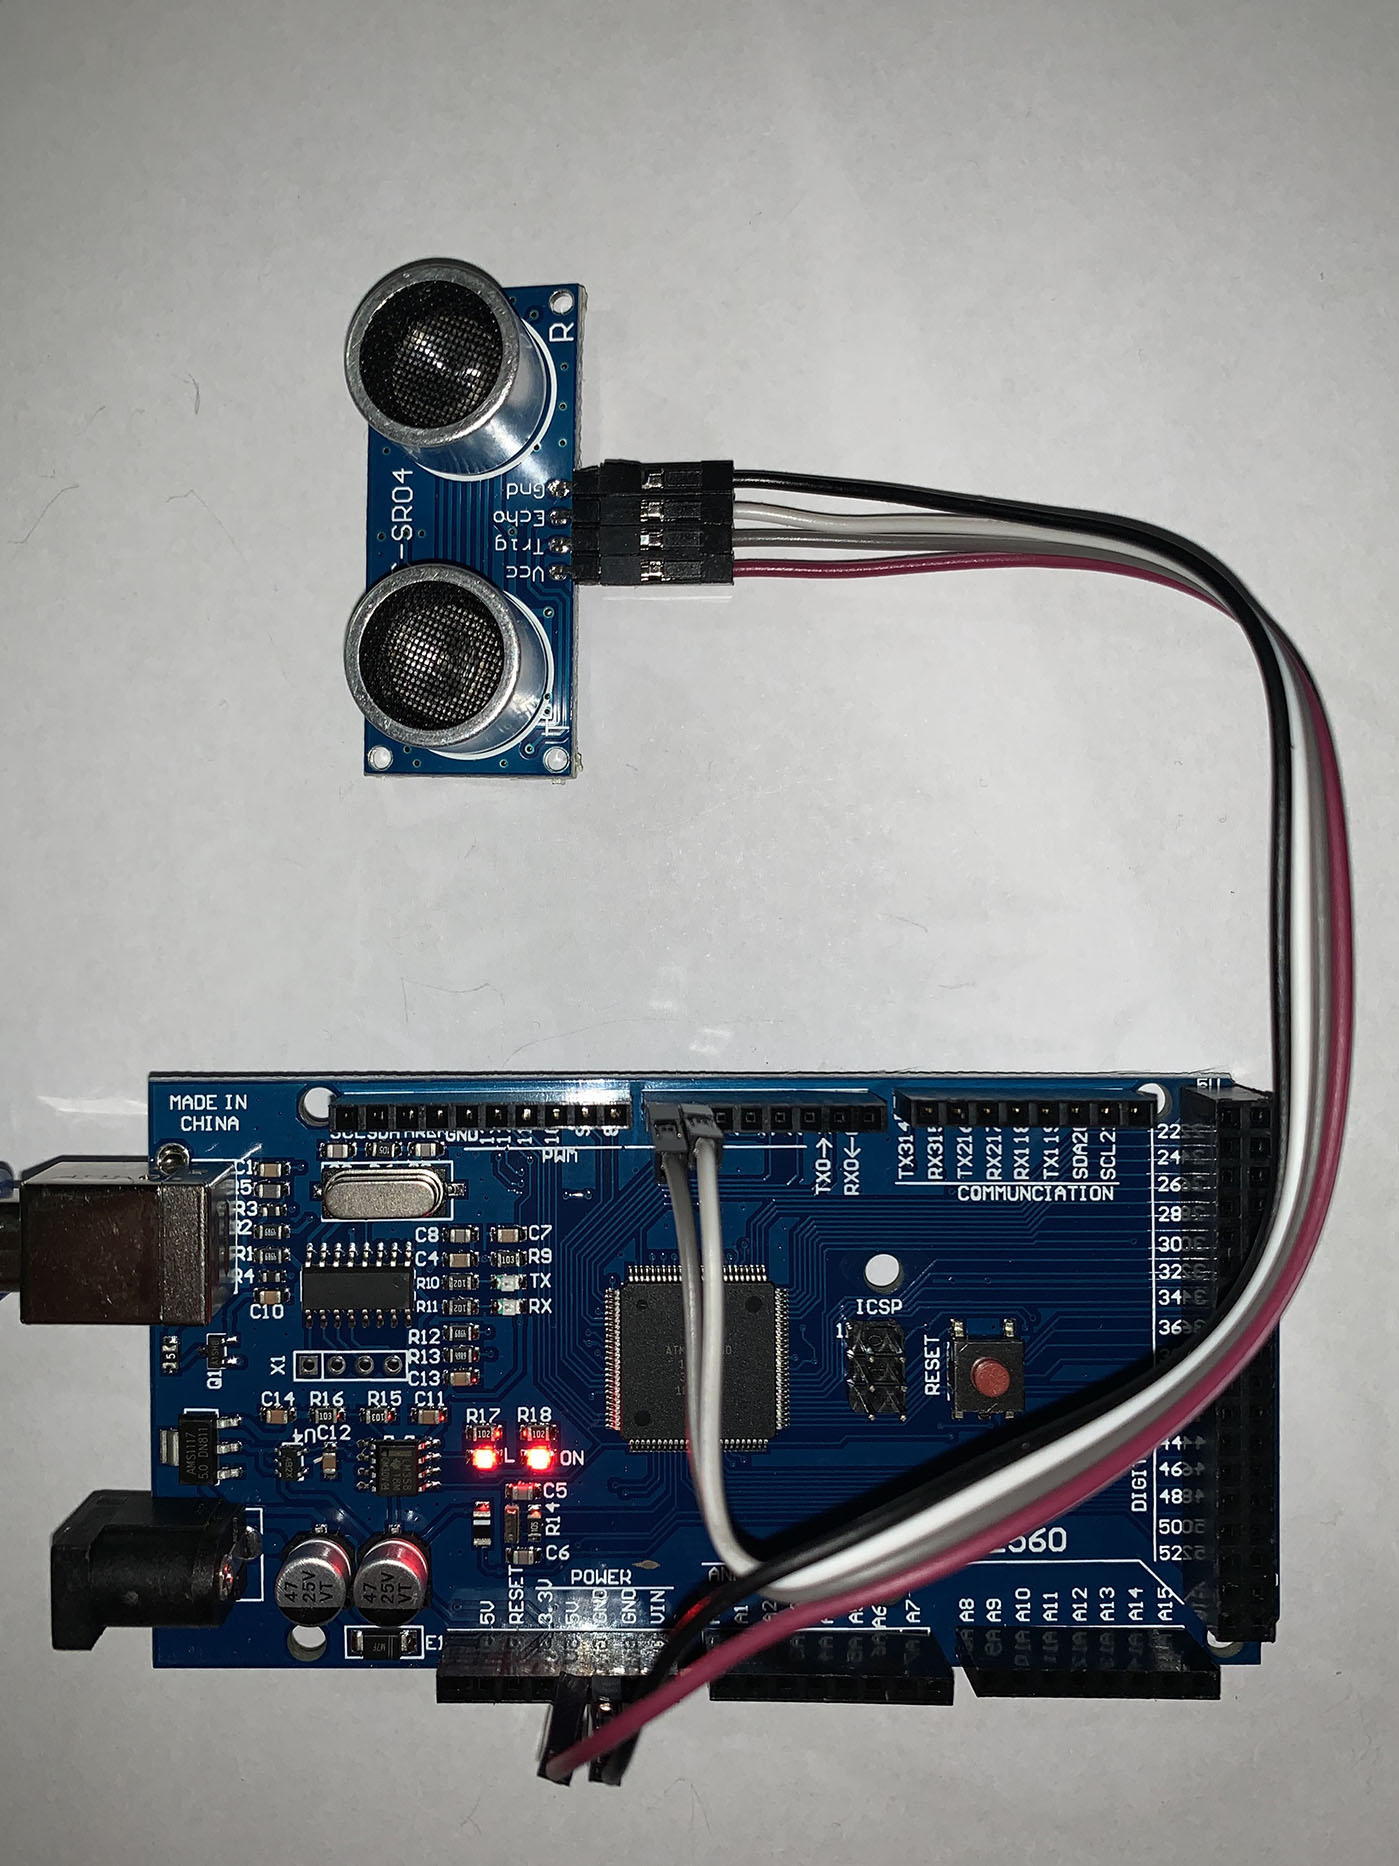
Example of using HC-SR04 ultrasonic sensor
We are going to use the same sensor from the article Water level sensor with Arduino, in order to demonstrate how to program the Arduino Mega; checking that said programming is 100% compatible with the Arduino UNO.
| Arduino Mega | HC-SR04 |
|---|---|
| GND | Gnd |
| 5V | Vcc |
| Pin 6 | Echo |
| Pin 7 | Trig |
Wiring diagram

Connections image
How to program the Arduino UNO
To program the Arduino UNO the software Arduino IDE v1.8.12 was used, the board was connected by means of the USB cable to the computer, and the following elements were defined to make the connection:
| Type | Value |
|---|---|
| Board | “Arduino Uno” |
| Port | COM4 (Depends on your configuration) |
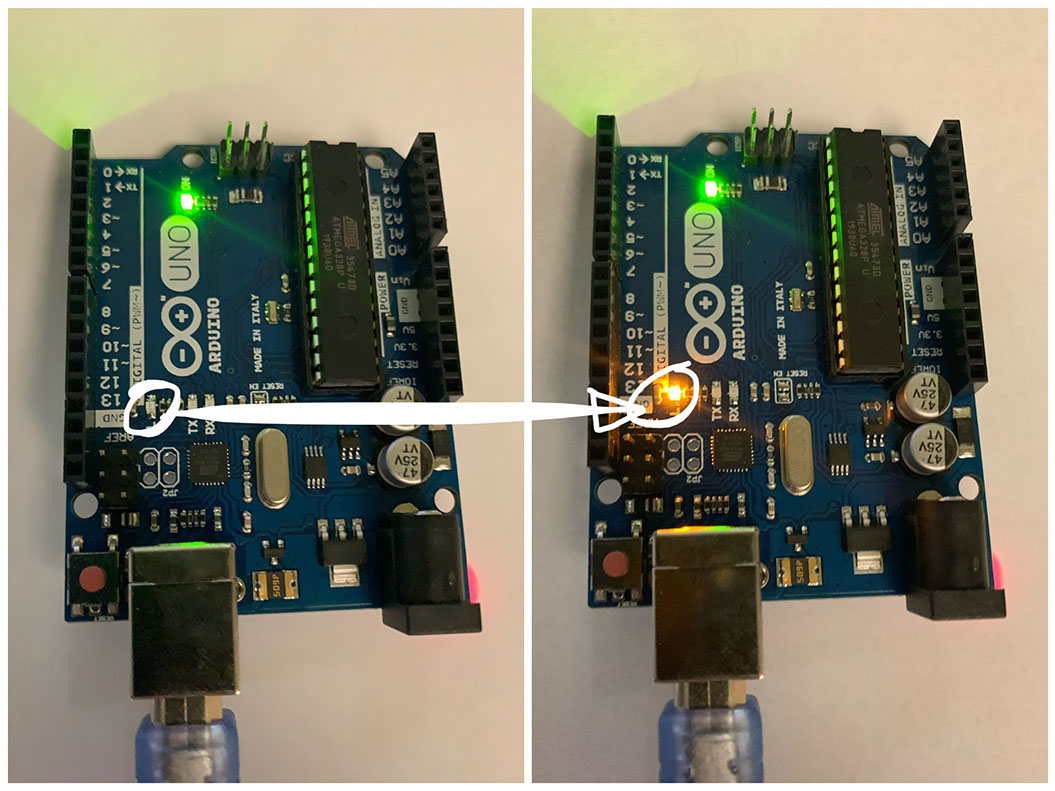
The simplest and fastest test, use of the built-in led
-
Select the project Blink that comes in the Examples of 01.Basics
-
Modify the milliseconds of the two
delayinstructions so that the “blink” of the LED incorporated in the board is more noticeable.delay(250); -
Upload the program.
-
Check the off and on of the led incorporated in the board.
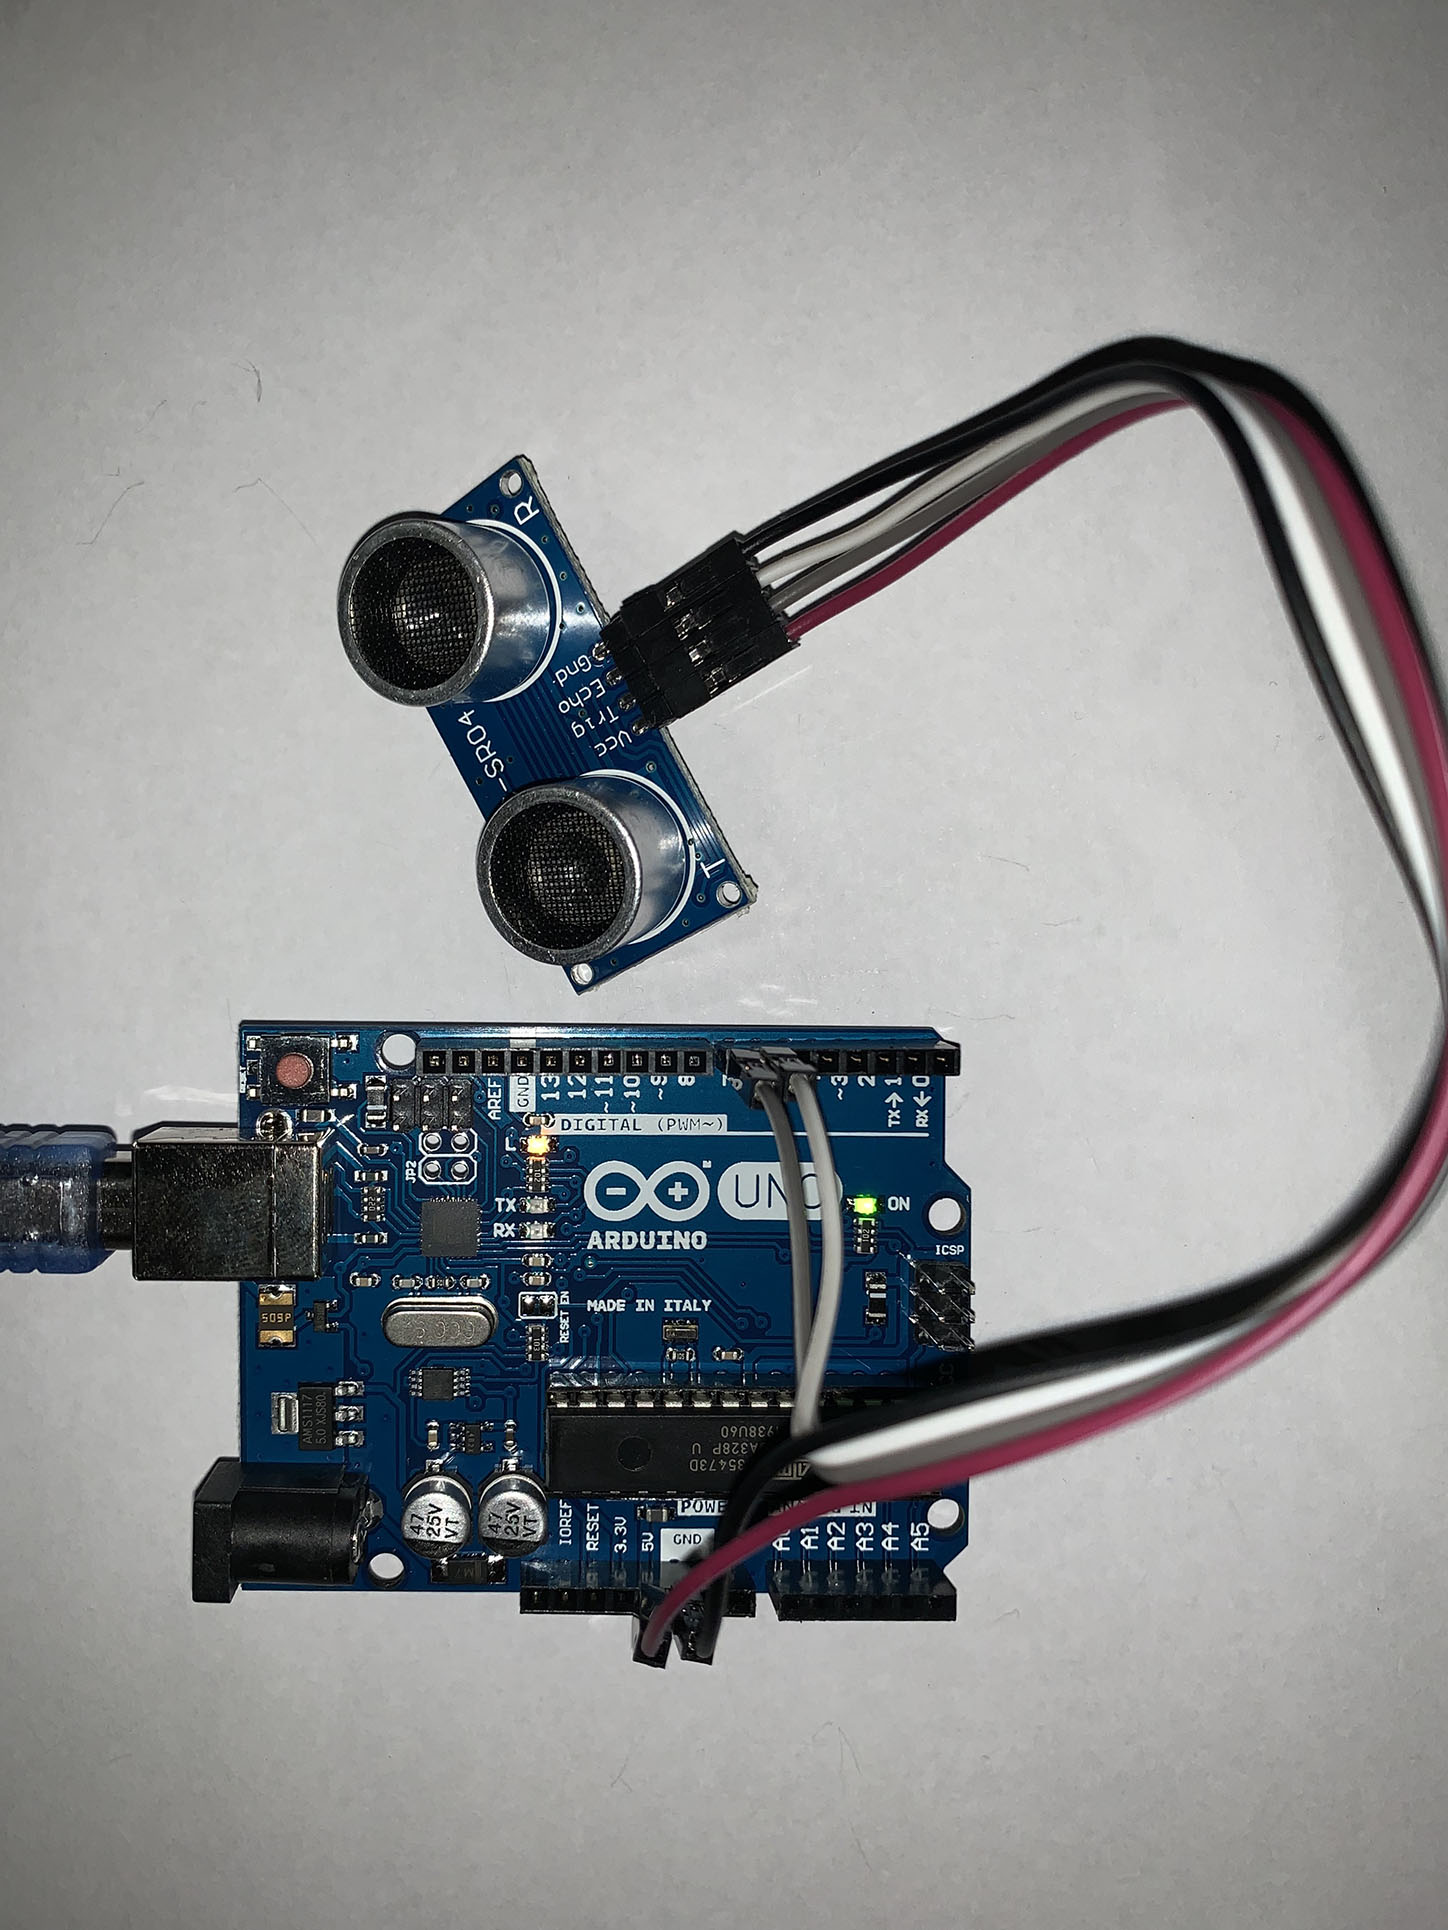
Example of using HC-SR04 ultrasonic sensor
We are going to use the same sensor from the article Water level sensor with Arduino, in order to demonstrate how to program the Arduino UNO; checking that said programming is 100% compatible with the Arduino Mega.
| Arduino UNO | HC-SR04 |
|---|---|
| GND | Gnd |
| 5V | Vcc |
| Pin 6 | Echo |
| Pin 7 | Trig |
Wiring diagram

Connections image
Conclusions
At this time, when we already know the Arduino Mega board, its characteristics, its differences and similarities, with respect to the Arduino UNO, validating that both are 100% compatible in its programming, we We find the faculty to understand what when you need to carry out a project, where you will have many sensors or actuators, as in the case of my friend, that his project of “Solar Meteorological Station 9 in 1”, which consists of sensors wind speed, wind direction, luminosity, soil moisture, temperature, relative humidity, rain precipitation (rain gauge) and GSM transmission systems, data storage, RF transmission and solar energy. This number of sensors and systems cannot be managed by a Arduino UNO, so it is necessary and mandatory for a team such as the Arduino Mega to carry out this task. However, in projects with few sensors the Arduino Mega would be completely underused, in this case the best option would be an Arduino UNO. Therefore, the use of one plate or the other will depend on your project.